It’s been really handy to be able to run virtual machines on regular Windows 10 machines, thanks to Hyper-v. However, I had some difficulties at the beginning because a lack of polishing about this feature. Here are some tips that can help.
Error when trying to start a new VM after its creation
The first issue I got after I had created my first VM, was make it starts! It could seem silly, however, for some reasons, when you click on “start VM” from the Hyper-V manager, the connector is not launched with administrator rights, hence it won’t start the VM with a weird error message.
The easiest way to workaround this, is to find and create a shortcut leading directly to , which is located here:
C:\Windows\System32\vmconnect.exe
Note that, virtmgmt.msc, is also located in that folder.
You will just have to run that exe with administration rights to get back on business!
First, install the repository, GPG key, and install the Google Cloud SDK
# Add the Cloud SDK distribution URI as a package source
echo "deb http://packages.cloud.google.com/apt cloud-sdk main" | sudo tee -a /etc/apt/sources.list.d/google-cloud-sdk.list

# Import the Google Cloud Platform public key
curl https://packages.cloud.google.com/apt/doc/apt-key.gpg | sudo apt-key add -

# Update the package list and install the Cloud SDK
sudo apt-get update && sudo apt-get install google-cloud-sdk
Init the GCP SDK
On desktop workstations, you can use the regular gcloud init. However, on console-only systems, you will need to use the following command:
gcloud init --console-only
You will be asked to authenticate, then you will have to copy/paste an URL in your browser (Even if your are working remotely on another server):
Then, pick the project you want to work with, and set if ask, the default region (europe-west6-a for Zurich for instance).
Configure Terraform
Go to a clean folder on your Linux server, then edit a main.tf file with the following:
Note that we set the tier to STANDARD, you can use PREMIUM depending on your needs.
Then, create the account.json and paste the content of the key file you have created.
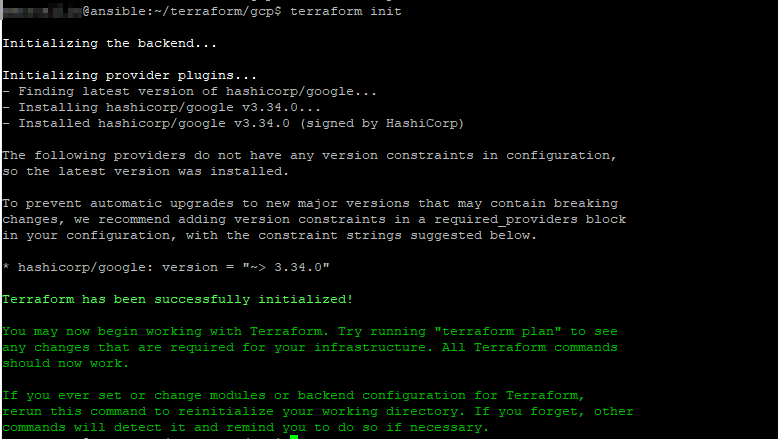
Eventually, run the following command to initialize your project:
terraform init
And you should end with a similar screen:
Example: create a vm instance in your project
Within your Terraform project folder, create beside the main.tf, a new file called whatever you want, but related to the instance you want to create, with the following content:
resource "google_compute_instance" "vm_instance" {
  name         = "my-instance-01"
  machine_type = "f1-micro"
  zone         = "europe-west6-a"

  boot_disk {
    initialize_params {
      image = "ubuntu-2004-focal-v20200720"
    }
  }

  network_interface {
    # A default network is created for all GCP projects
    network = "default"
    access_config {
    }
  }
}
This file defines a f1-micro instance located in europe-west6-a, running on ubuntu 20.04, with a default network configuration.
To check what is going to be created, run the command below:
terraform plan
To actually apply this plan, run the following command: