This page focuses on how to run your Angular application locally, during the development phase.
The following command will compile and re-compile live each time you update the code, plus this will be accessible from anywhere in your network (think about allowing ingress traffic, on your Windows firewall, for port 4200) with some additions:
–host set to 0.0.0.0 will allow any device on the network to access your server
–public-host set the URL you wanna access your app with, when using a reverse proxy (and I do)
ng serve --host 0.0.0.0 --public-host https://core-dev.fevio.fr/
As we are going to work with tokens, authentication, and service workers, we are going to need HTTPS. If not already done, you should configure your reverse proxy for a dev URL. Here we are going to use:
https://core-dev.fevio.fr
This will allow us to access our application from any local device (192.168.1.0/24) using a proper domain name, saving us headache caused by a lack of HTTPS.
For security purpose, I have added the following lines to limit this access only to local devices (this is specific to my architecture and written here as a reminder)
location / {
  # allow subnet 192.168.1.0/24
  allow   192.168.1.0/24;

  # drop the rest
  deny    all;
}
In order to develop faster, better and easier, it’s a good practice to take a moment to setup your dev environment. Her I am talking about how I configured my Windows 10 environment for Angular.
Visual Studio Code
Here we are cheap, meaning we won’t go with a non free solution like Angular-IDE, but using Visual Studio Code, you can do great things too!
To install VSCode using chocolatey:
choco install vscode
Now we can add extensions to VSCode in order to make things easier:
This time we will focus on installing all the necessary tools on our Windows system in order to start developing with Angular.
NodeJS installation
Run the following command on an admin PowerShell prompt. We are using the LTS version
chocolatey install nodejs-lts
Installing NodeJS should also add NPM, to check, run npm -v to see if it’s present on your system.
NPM and Angular CLI installation
We will need to install the Angular CLI as well, this tool will be handy to create our Angular projects, application and code. To do so, run the following code
npm install -g @angular/cli
You might have some warnings, they seem not important, so do not worry.
Angular project initialization
When it’s done, you can now initialize your Angular application using the following command
ng new my-project
They will ask you some questions
Would you like to add Angular routing?
This will help you routing your user requests, if you new to Angular, choose this option
Which stylesheet format would you like to use? SCSS [ https://sass-lang.com/documentation/ syntax#scss
This will let you choose which kind of style sheet you want to use, I decided to try SCSS which is way more powerful than regular CSS, but this part is totally up to you
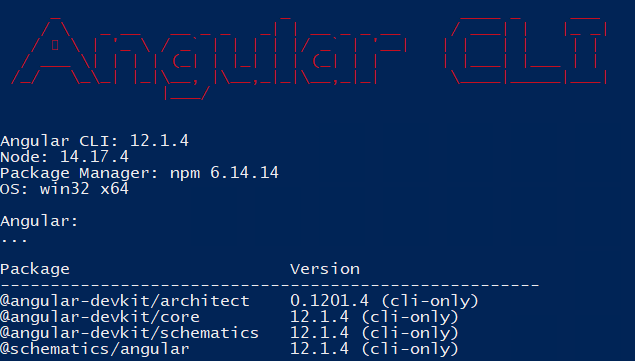
Finally, run ng version to show which version of Angular you have actually installed
Recently my dear was looking for an application to manage her wine cellar. As a former web developer, I immediately wanted to create the best app for her needs. However, I was a PHP developer, and it was not the best language to develop such a tool. So, I decided to learn Angular, I did that for a month, ended up with a nice structure then I had to stop, because of my new position which was too intense to let me continue.
Now, I have been able to keep some time for me, so here I am starting over with Angular 12, yes, many updates were released since my first iteration and as a newbie, I think it would be better to start everything over…
Anyway, first thing first, I need to setup my workspace and this is the page to start with. Let’s go…
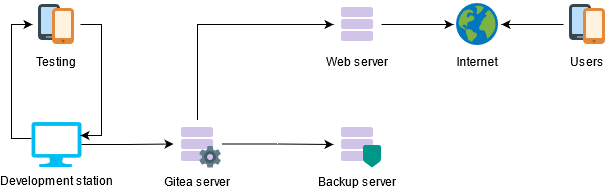
Infrastructure
Gitea server – code management
In order to keep track of my code, I will try to use Gitea which was highly recommended on the web, using a Docker container.
Docker compose
Here the docker compose file I used to create a very basic server
Then launch docker-compose up -d to start the container in background mode
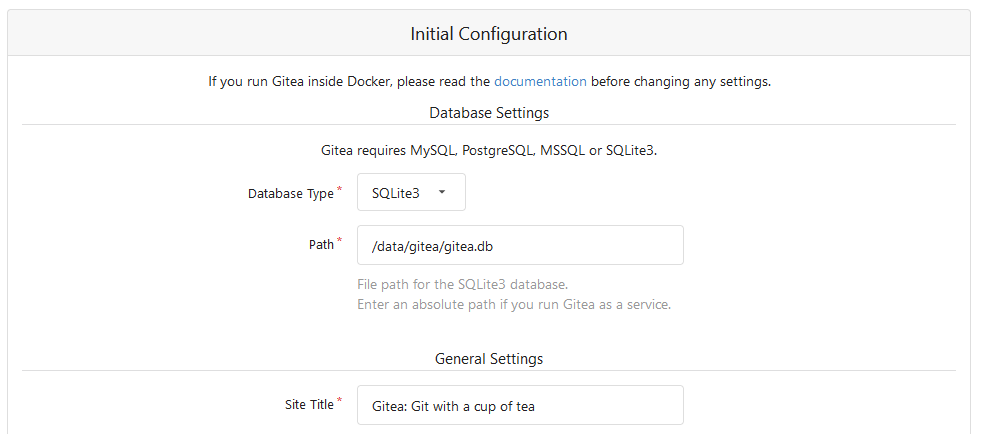
Browse your Docker server IP address on the 8010 port, for me it is http://192.168.1.24:8010/ you should arrive on the configuration page:Here my configuration:
Database: SQLite3 to avoid having a separated SQL server for my own small projects
…
Gitea Base URL: you can use the current IP mode, or use a reverse proxy with Let’s encrypt to make things more secure/professional, it’s up to you.
Email settings: think about adding the port in the end, for instance: smtp.gmail.com:465
Once your done, you can access and authenticate to your brand new Gitea server.
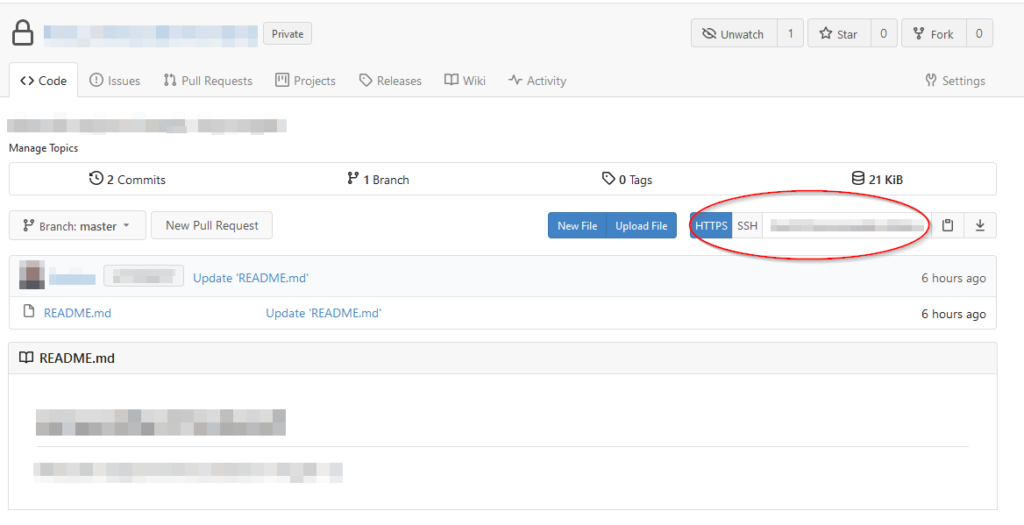
Configure the repository
Use Gitea web interface to create a new Organization then a new repository, there is nothing complex here. Once it’s properly setup you should end up with a single file project (the README.md) on your repo. On the project’s page, locate the HTTPS part and copy the URL on its right.
Install GIT client on Windows
In order to get Git command, install the following chocolatey package
chocolatey install git
Next, open a PowerShell client, browse to your project repository, then run the following commands, using the HTTPS URL you got just before