This page is about configuring an RFLink RTS capable device to be able to connect to a HomeAssistant server through MQTT, using a NodeMCU for the interface.
Hardware requirements:
- RFLink 433 (Somfy RTS) / Arduino Mega / Dipole / USB cable
- A NodeMCU
- Some straps to connect your Arduino Mega and NodeMCU
Software requirements:
- Homeassistant
- Arduino IDE
Configure NodeMCU
This part is based on Mr Seb82 and you can check his original work here: https://github.com/seb821/espRFLinkMQTT
For convenience / archive I will put the zip file version of what I used here:
Unzip it on your computer, edit the config.h file and edit the Wifi parameters especially:

If you know about your SSID config, you can comment the last line. If you don’t the NodeMCU will boot as an access point, connect to it (IP is 192.168.4.1) then go to the system tab. Note this tab won’t show up on a smartphone unless you switch your browser into Desktop Mode.
Once this is configured, open espRFLinkMQTT.ino with Arduino IDE, and load it to your NodeMCU (You might need to install a library for that, depending on your configuration)
After two minutes you should see the NodeMCU either connected to your router (if the last line was commented) or its SSID appearing on your available Wifi network list.
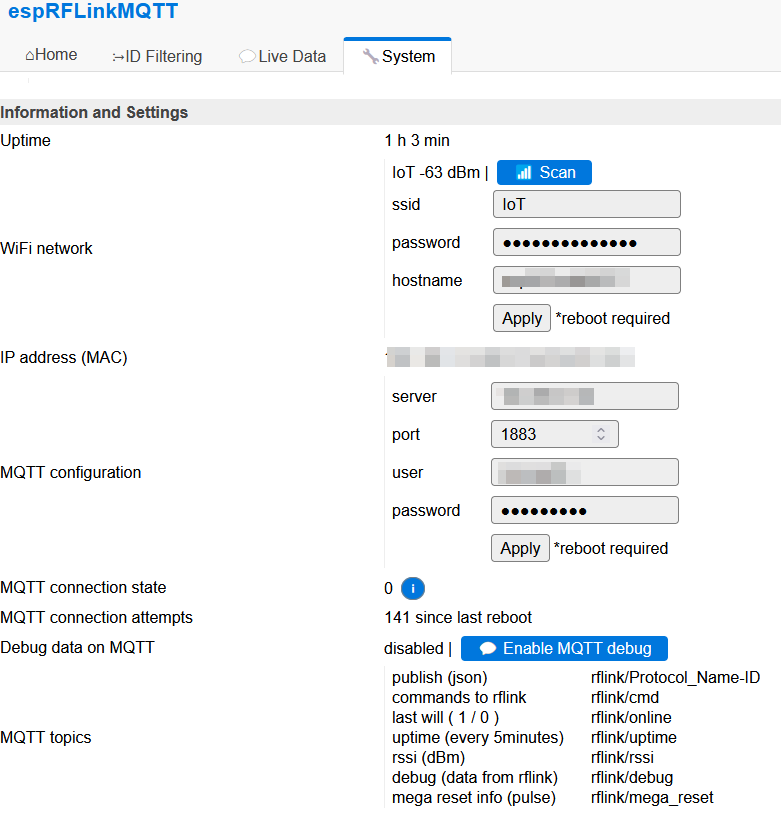
You can now access it via http://itsIP and configure the MQTT part on the system tab.
Here is an example with MQTT properly configured:
RFLink configuration
- Download the RFLink loader and the RFLink firmware from here: https://www.rflink.nl/download.php
- Open the loader, connect your Mega to your computer and load the firmware you got
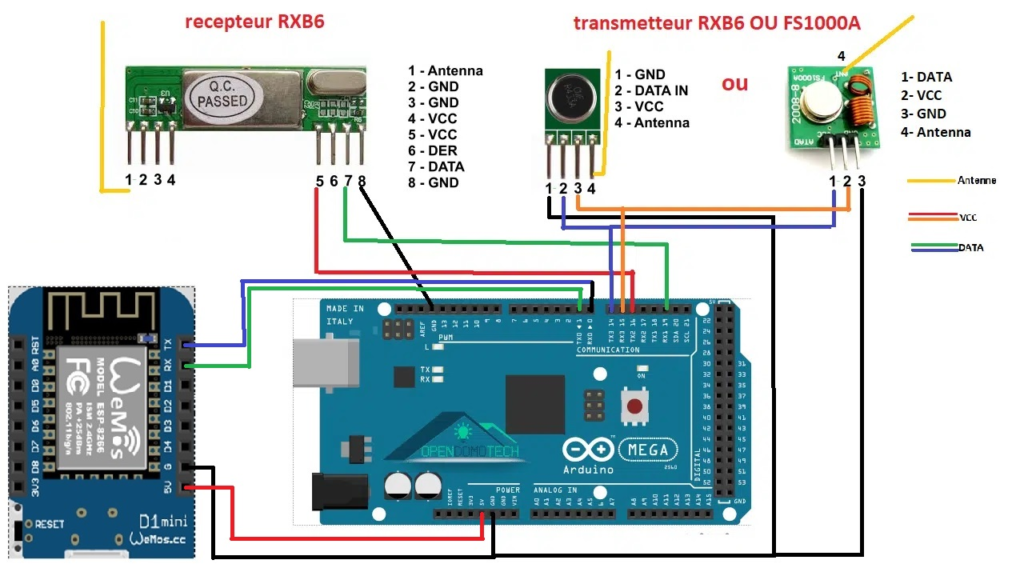
So, you must have the Arduino Mega, a gateway board (the one with the antenna plug) and a small board with the 433Mhz module on it. Assemble everything + connect your NodeMCU like in this image, with one specification:
- Use the 3.3v connector from the Mega card to connect your NodeMCU because it does not work with 5v
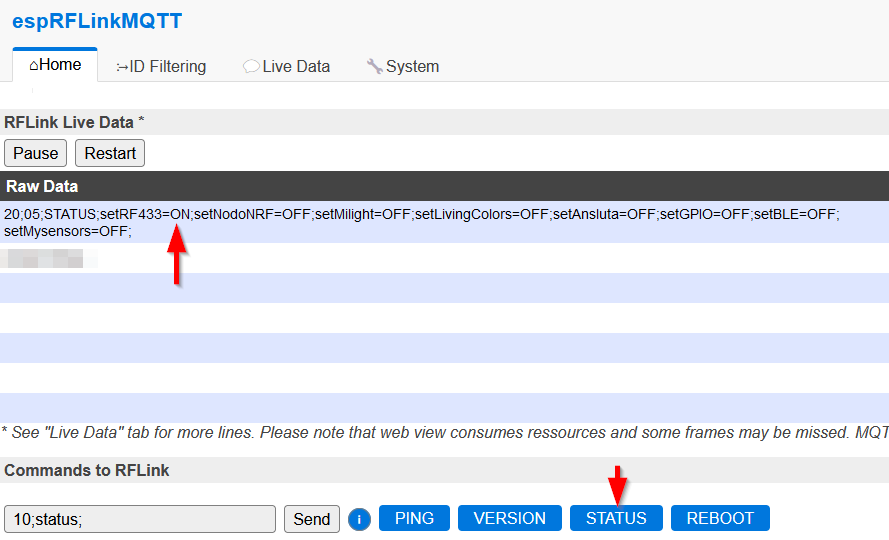
Plug your Mega on a USB interface and both the Mega and NodeMCU might turn on, you should now be able to test the communication, for that reach your NodeMCU IP address with your browser, and on the first page, click the STATUS button:
Mosquitto
This page won’t explain how to configure Mosquitto, but you must have a broker like this to interface between your NodeMCU and Home assistant.
Homeassistant
Enabling MQTT
- Go to settings, Devices & services
- Click the button to Add integration, search for MQTT
- Configure it depending on your Mosquitto (or any broker you have set)
Configuring a test automation
- Settings, automation and scenes, create automation
- Trigger:
- MQTT
- Topic: rflink/uptime
- Action
- Whatever you want
 but if you have a Google Home:
 - Call service
- Text-to-Speech
- Entity: your google home
- Message: ESP Online
- Whatever you want
This will shout ESP online every 5 minutes, when your NodeMCU publish its uptime.