When you want to apply Windows Update by working around a GPO in place, or remotely on a computer without having to RDP on it, knowing some command line commands might be useful.
However it’s hard to find the perfect way to do it, actually, I am still looking for it. I found the following possibilities, but none of them is perfect.
Applying updates remotely, from a PSSession
This command will trigger the installation of pending updates, remotely, yet you won’t be able to see what’s going on as there is no output
The good thing about this one is it able to apply feature upgrades (From one Windows version to another one). You will need to ask the user to reboot and apply though (He should see the orange button while restarting his computer)
Another way, to apply updates, is to use the following Powershell module
With this method, it seems hard to apply them from a PSSession without getting access denied, I think I need to dig deeper to understand why. However, you can run it from the workstation if the policy in place denies you to do it from the GUI (as an administrator obviously):
# install the module, once for all
install-module pswindowsupdate

# trigger Windows update check
get-windowsupdate

# Finally, and this command does not work remotely, install them
install-windowsupdate
When you like dealing with servers or workstations remotely, using PSSession for instance, or when you are just a terminal nerd, it’s really nice to be able to run Windows Update this way.
This post will list what you have to to do in order to enable this feature on a Windows 10 workstation.
Trust the gallery
In order to install the Windows Update PowerShell module, we have to trust the Microsoft repository where it comes from. To do so, use this command:
Batch set a specific setting to a whole OU (recursively)
Here, we set all our user in order to prevent them from changing their password (That was used during a migration). The way I used here was a bit different:
If you don’t have access, use the following command to enable PSRemoting on the server you want:
Enable-PSRemoting -SkipNetworkProfileCheck
Note that it won’t work if the server or workstation is using a public network, the command check network profiles before applying this change. However, I got a weird behavior where none of my network profiles were using a public profile but PSRemoting was telling me the opposite. To workaround this, use the following command:
Windows Admin Center (WAC) is a new way introduced by Microsoft to manage your servers, workstations, and clusters.
Using TLS between WAC gateway and servers
WAC gateway is the tool you install on a server or workstation to act as a gateway between administrators and servers/stations/clusters. During its installation, you will be asked to choose between regular or encrypted communication between your assets and this gateway. As we should all do, I did choose encrypted communication.
Choosing TLS implies you to deploy a valid certificate for your server to encrypt its gateway’s connection. This certificate must be trusted by your gateway machine obviously. Here the process to do it, using a self-signed one though.
First, if its a workstation and not a server, you need to enable PSRemoting
Enable-PSRemoting
Then allow port 5986 between your server and the gateway (This must be done on the server, because installing WAC on your gateway should have fixed that already.
If your organization has a PKI infrastructure, you will need to configure it to delivers certificates to your servers and workstations.
Configure your subordinate CA to delivers WinRM certificates
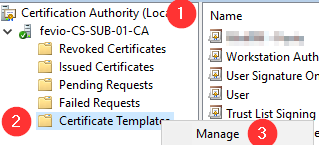
Open Certification Authority on your Subordinate CA and go To Certificate Templates Management
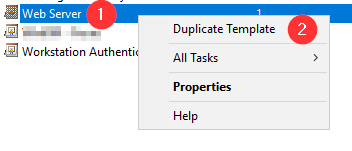
Duplicate the Web Server template
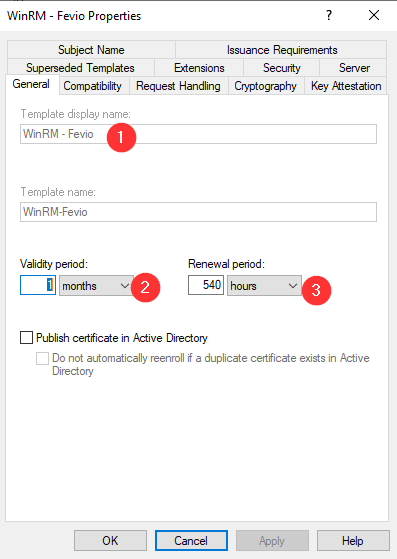
Set a name (Here it’s an existing template and that’s why it’s grayed out) and a validity period (This setting is up to you)
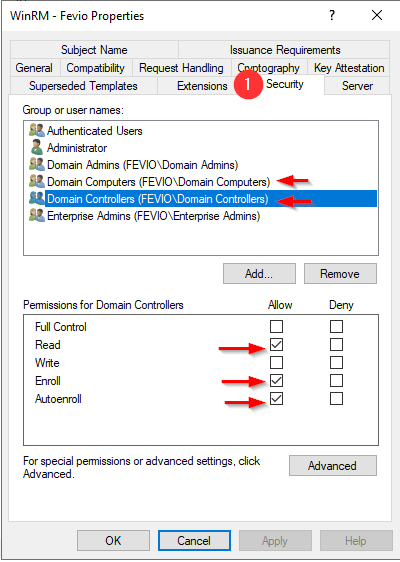
On the security tab, add the groups of devices you want to allow to enroll. In my example, I have added Domains Controller and Computers, so I can both manage my DC servers and my workstations through WAC.
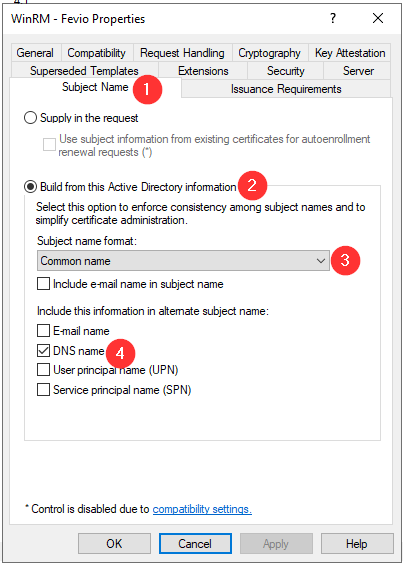
Setup the subject name as above
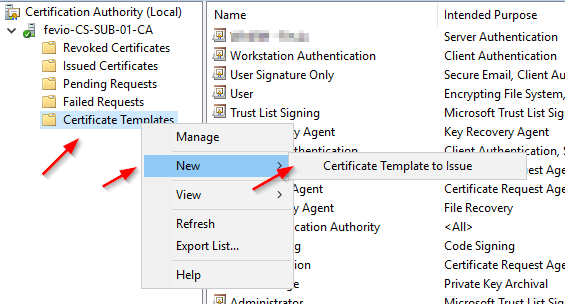
Close the Template manager and add the new template to your Certificate templates to make it available on this CA
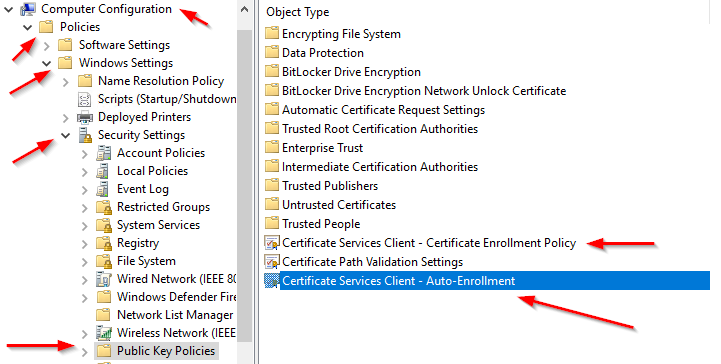
Go to one of your Directory Controller and confirm that a GPO exists with the following Security policies enabled and properly configured
Refresh the GPO on one of the server you want to remotely manage:
gpupdate /force
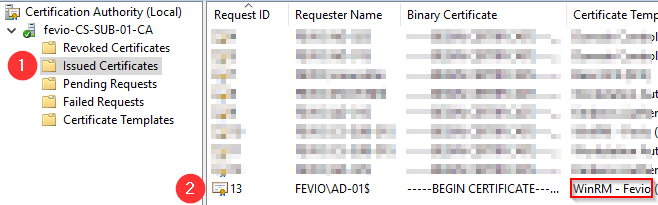
Check on the subordinate CA if the certificate has been issued properly, using the MMC view:
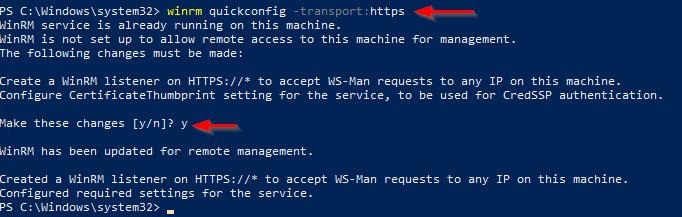
Go back on the server you to remotely access using WAC, and run with an elevated PowerShell the following command to create an HTTPS listener using the new certificate:
winrm quickconfig -transport:https
Note that you can run the command above through a remote Powershell session!
You should end with a positive message, and from there, good to connect using Windows Admin Center
Without an internal PKI
Without a PKI, you will have to generate a self-signed certificate then import it on your WAC gateway, that’s a bit dirty but if you just want to try, go ahead with the following:
Create a self-signed certificate (update the FQDN part, like myad-001.fevio.fr):
The server will then install the different roles required, including the DNS part, and reboot after the process ends.
Note that, running repadmin.exe /replsummary through a remote PS shell will fail, to check the replication status you will need to run those commands from the local terminal of your server, or through a remote desktop session for a non-core server.
In order to check your DC’s health, is important to check the DFS replication state used for the NETLOGON and SYSVOL shares. To do so, here a command that would be useful: dfsrdiag.exe
The example below show its status on the DC on which it is run on: