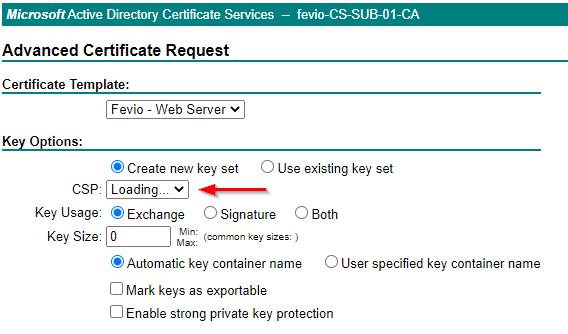
When I tried to generate a new certificate for one of my webservers, I encountered an issue with the certsrv page, which was stuck with a CSP loading message:
You can wait forever here, nothing will happen
It seems related to a missmatch between the Internet Explorer security options and the security zone where your certsrv site is placed.
There a different ways to fix that, here the one that fits my needs:
Connect to a remote session to My-Subordinate-Server
If you don’t have access, use the following command to enable PSRemoting on the server you want:
Enable-PSRemoting -SkipNetworkProfileCheck
Note that it won’t work if the server or workstation is using a public network, the command check network profiles before applying this change. However, I got a weird behavior where none of my network profiles were using a public profile but PSRemoting was telling me the opposite. To workaround this, use the following command:
Windows Admin Center (WAC) is a new way introduced by Microsoft to manage your servers, workstations, and clusters.
Using TLS between WAC gateway and servers
WAC gateway is the tool you install on a server or workstation to act as a gateway between administrators and servers/stations/clusters. During its installation, you will be asked to choose between regular or encrypted communication between your assets and this gateway. As we should all do, I did choose encrypted communication.
Choosing TLS implies you to deploy a valid certificate for your server to encrypt its gateway’s connection. This certificate must be trusted by your gateway machine obviously. Here the process to do it, using a self-signed one though.
First, if its a workstation and not a server, you need to enable PSRemoting
Enable-PSRemoting
Then allow port 5986 between your server and the gateway (This must be done on the server, because installing WAC on your gateway should have fixed that already.
If your organization has a PKI infrastructure, you will need to configure it to delivers certificates to your servers and workstations.
Configure your subordinate CA to delivers WinRM certificates
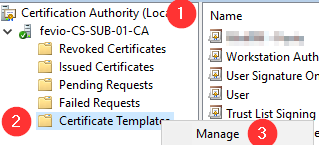
Open Certification Authority on your Subordinate CA and go To Certificate Templates Management
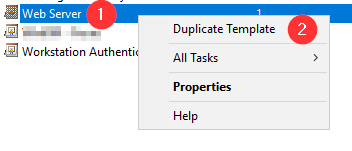
Duplicate the Web Server template
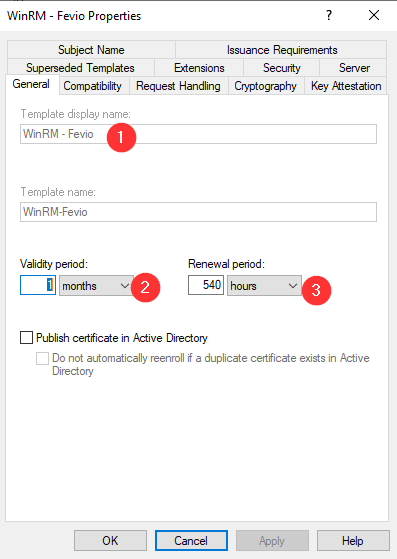
Set a name (Here it’s an existing template and that’s why it’s grayed out) and a validity period (This setting is up to you)
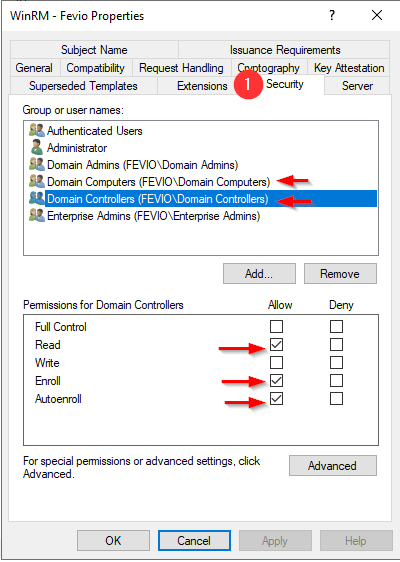
On the security tab, add the groups of devices you want to allow to enroll. In my example, I have added Domains Controller and Computers, so I can both manage my DC servers and my workstations through WAC.
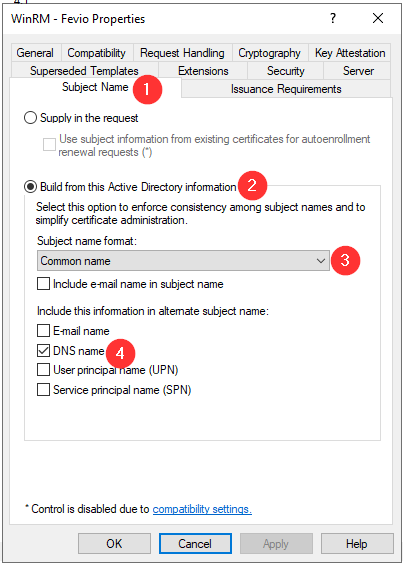
Setup the subject name as above
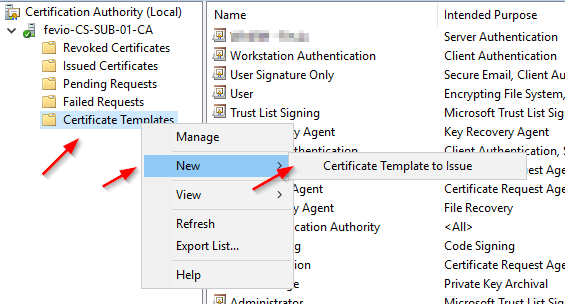
Close the Template manager and add the new template to your Certificate templates to make it available on this CA
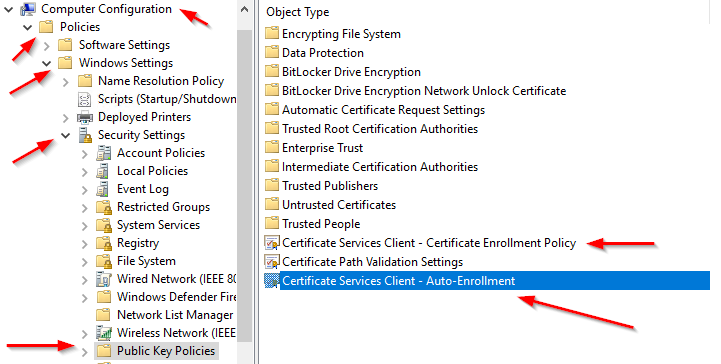
Go to one of your Directory Controller and confirm that a GPO exists with the following Security policies enabled and properly configured
Refresh the GPO on one of the server you want to remotely manage:
gpupdate /force
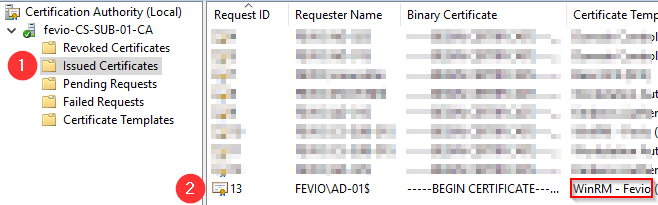
Check on the subordinate CA if the certificate has been issued properly, using the MMC view:
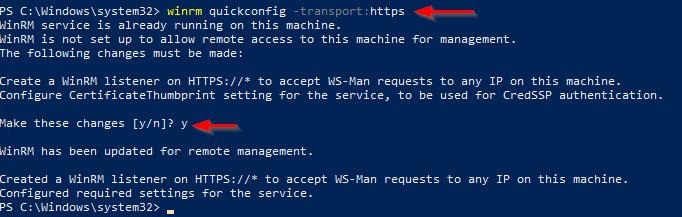
Go back on the server you to remotely access using WAC, and run with an elevated PowerShell the following command to create an HTTPS listener using the new certificate:
winrm quickconfig -transport:https
Note that you can run the command above through a remote Powershell session!
You should end with a positive message, and from there, good to connect using Windows Admin Center
Without an internal PKI
Without a PKI, you will have to generate a self-signed certificate then import it on your WAC gateway, that’s a bit dirty but if you just want to try, go ahead with the following:
Create a self-signed certificate (update the FQDN part, like myad-001.fevio.fr):
The server will then install the different roles required, including the DNS part, and reboot after the process ends.
Note that, running repadmin.exe /replsummary through a remote PS shell will fail, to check the replication status you will need to run those commands from the local terminal of your server, or through a remote desktop session for a non-core server.
In order to check your DC’s health, is important to check the DFS replication state used for the NETLOGON and SYSVOL shares. To do so, here a command that would be useful: dfsrdiag.exe
The example below show its status on the DC on which it is run on:
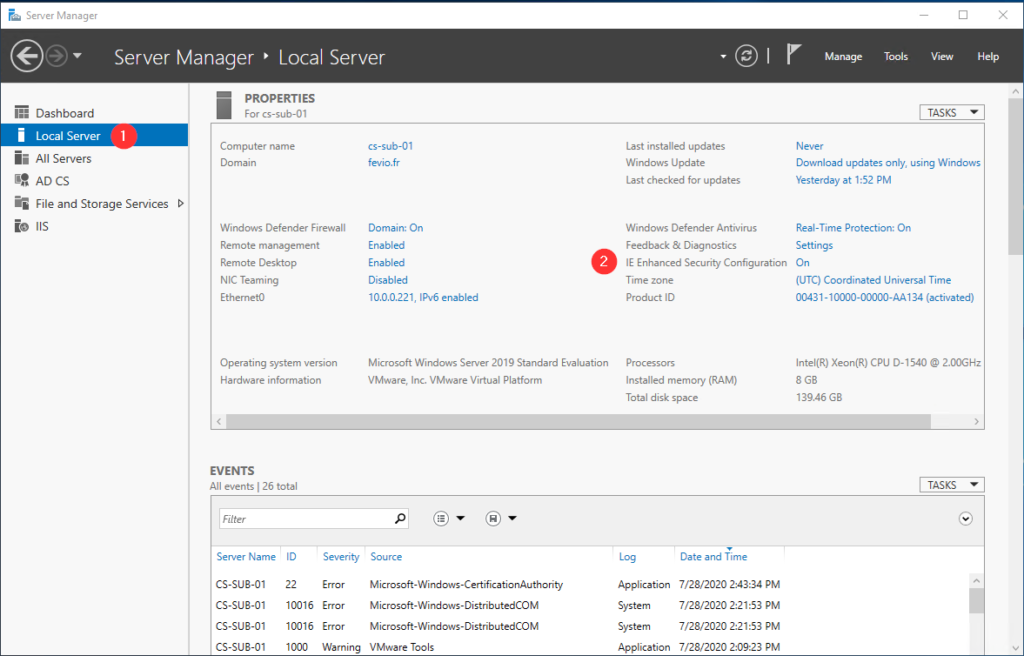
Actually, this mode is called Internet Explorer Enhanced Security Configuration, and you will face it each time you setup a new server. Usually, you won’t bother to change that because Internet Explorer is not the tool you want to use on a server, however, it is sometimes useful to get some packages, access some ressources online, and when that’s the case, you will swear to God how you hate that mode!
After having installed a new domain, I had to configure both time and timezone on the new AD servers, without using the time provided by the hypervisor, I had to configure those Windows servers to use an external NTP server. As I prefer to do that using script, I read the documentation to find out the proper commands to use:
# Configure Time Zone and NTP server
$TimeZoneID = "UTC"
$NTPServer = "ca.pool.ntp.org"

# Update the timezone
Set-TimeZone -Id $TimeZoneID -PassThru

# Set the NTP server
w32tm /config /syncfromflags:manual /manualpeerlist:"$NTPServer" /reliable:yes /update

# Restart the time service
Restart-Service w32time
If you want to see what’s configured, here some useful commands. Note that it could take between 10 and 60 seconds for the source and time to be updated depending on your network: